Beef Shanks: Shins and Grins
- CarolOfMoon

- Jan 14, 2022
- 7 min read
Updated: Mar 13, 2024


When I read articles about past generations, or cookbooks with history lessons embedded in them, which I often do, I am always fascinated with villages who would (and still do) slaughter an animal and use every last part of the animal for one thing or another. Not a scrap is wasted. Not a one. Many chefs have adopted this same philosophy; every scrap of meat and vegetable is used for something. Waste not, want not.
Living through a pandemic, we seem to have a better understanding why our grandparents hoarded canned goods in the basement and why we didn't eat filet mignon every day instead having creative dishes using inexpensive cuts of meat.
Most of us grew up on ground meat. You know why? Yes, it was cheap. It was also versatile. It could be made a million different ways and stretched a thousand percent to feed many hungry mouths.
The recent meat price increases got us back to thinking like our grandparents. By getting inventive or reinventing less expensive cuts of meat for our everyday meals we can keep to our budgets.
Other cuts of meat are also economical like ground beef and, in my opinion, way more flavorful than the expensive steaks and filets.
Beef shanks are one such cut.

Beef shanks are a very lean cut from the leg of the cow. The shank is found just above the knee or hock. It is cut in horizontal cross sections (often in 1-inch slices), which is why beef shank looks like a steak. Braising (cooking in liquid) or slow roasting are the two best options for this type of meat.
Don't think for a second though that it is not a tasty part of the cattle, it just needs a little extra time for the connective tissues to breakdown and cook soft. I find that the brisket (shoulder) and shank are some of the tastiest parts of beef. (I'll be doing a brisket blog in March where I'll explain that cut of meat in a little more detail).
Cross sectioned shanks also offer cooking with bone marrow. It's the white inner part of the bone that is surrounded by the flesh of the shank and may be the absolute most tasty part of any animal- including beef. Remember umami? I've talked about in other blogs. That extra "what is that flavor?" umph that differentiates one dish from another. Bone marrow offers that umami. (I have a bone marrow blog lined up as well- everything from roasting the bones to making butter with it. YUM)
Cooking Class with Carol
Trust the Process


Beef shanks are tough cuts of meat. Cows walk everywhere and their leg muscles are used constantly. This is why shanks are considered a tough cut of meat and due to the lack of fat. But that doesn't mean they are not tasty; they just need to be cooked longer to break down the connective tissues in the muscles. Braising (cooking in liquid) and roasting the meat with low heat for long periods of time allows those connective tissues to melt away leaving tasty soft meat to eat. But you have to trust the process of slow and low cooking.
Quality
Simple recipes call for quality ingredients. There is no hiding behind flavor profiles when ingredients are minimal. Stick with purchasing good quality products and you will taste it in your food. I promise.
Size matters
It is your preference after all.
Cutting vegetables for this recipe will depend on what you're looking for in the finished product. If you want the vegetables to be part of the finished product, large cuts will allow the vegetable to maintain its integrity and be visible in the sauce. Cut the vegetables small and they are likely to melt away only leaving you with their flavor. Rustic (large) or refined (small) vegetables are both correct. It's your prerogative. (You can do what you wanna do!)
Trust the Process 2.0
Read the 'what to do" a few times before attempting. It's not a hard process but leaving out any step will alter the finished product.
Prep your Meat-If you have got the time, salt your meat at least 40 minutes before cooking. Allow to stand at room temperature while you prep for the meal. If you don't have 40 minutes, it's better to salt it immediately prior to cooking. Salting helps proteins retain their own natural juices and is the best choice for meats that are already relatively juicy and/or well-marbled. When salt is applied to raw meat, juices inside the meat are drawn to the surface. The salt then dissolves in the exuded liquid, forming a brine that is eventually reabsorbed by the meat. Your meat will not go bad sitting out during prep time.


Sear the meat-- in a very hot skillet, with very little or no oil we will place the meat in to create a dark caramelized hard surface on the meat --to lock in the flavor and bring color to the meat. This is one step beyond browning. This is 100% about flavor building. It's a must. It will be scary to see your pan smoking, but it is SO worth it. While you're waiting for your pan to heat to the proper temperature, imagine how you will arrange your shanks in the pan. Once you drop the shank in the pan it will be hard to lift at this point and could tear the meat. Do a dry run (in a cold pan) to make sure they fit. If they all don't fit? You will have to sear in batches. Crowding the pan will make it hard to sear properly.
After 3-5 minutes searing in pan
Scrap off the brown bits-- those pesky looking burn spots on the pan are what classically trained chefs will refer to as fond-- In French it translates to "the bottom" or "the base" and is used to describe the browned bits of meat and vegetables in the bottom of a roast pan or skillet. Use a wooden spoon with a flat bottom for best results.
The technique for dislodging the fond from the bottom of the pan and incorporating into a sauce is called deglazing. We will do both in this recipe. This process will also build the flavor profile and should not be skipped.
Braise meat in oven- once the recipe comes to a slow boil on the stovetop we will transfer to a low-heat oven to finish cooking. It's very hard to overcook this meat because the meat is seared and braised (cooking in liquid).
Bone Marrow- Again, your prerogative, but you have some on decisions to make. Once the meal is cooked and allowed to cool enough for you to handle the meat, you may want to fish the bones out of the dish. If you cannot easily remove the bones from the meat, it didn't cook long enough. (Put is back in the oven checking every 30 minutes until meat falls off the bone) But if the meat falls away from the bone easily, you have some decisions to make.


You can:
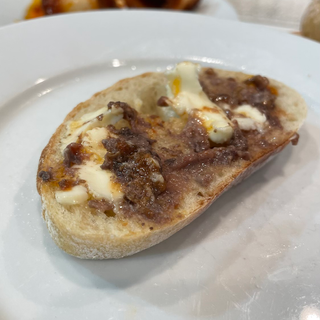
take the bone marrow out and reserve for your own enjoyment (on grilled buttered crusty bread is how I like to eat it)
remove from bones and add back into the dish.
I tend to do both-- a little delicious and healthy snack for the one preparing the meal and add some back into the dish for those I love cooking for.
See this article from WebMD about bone marrow.
Anticipation is the hardest part, but if you can plan ahead and cook the day before you want to serve, the flavors will have melded together, and the depth of flavor will be more than you ever could have imagined.


Ingredients


3-4 beef shanks, at least 1/2 pound per person
2 large onions, sliced
1-pound long carrots (not baby carrots), peeled and sliced on the bias (diagonally)
3 cans whole or crushed tomatoes (San Marzano style)
6 gloves garlic, crushed
2 T. tomato paste, or 1/2 can
1 cup red wine (your favorite or anything you have open)
1 c. fresh basil, 1/2 cup during cooking, reserve 1/2 cup for serving
2-3 bay leaves
2 T. Extra Virgin Olive Oil
salt and pepper
for dinner
1-2 pounds rigatoni, cooked according to directions on the box
your favorite crusty bread and softened butter
Pecorino Romano or Parmigiana Reggiano cheese
What To Do
Preparing Shanks for Cooking
Preheat oven to 350 degrees using bottom rack
Remove shanks from refrigerator. Season meat with salt and pepper and allow to stand for 40 minutes.
Prep your vegetables
slice onions going with the grain of the onion
peel and cut carrots on bias (diagonally)
peel and crush garlic cloves. Leave whole so you can fish them out if you want
If using whole tomatoes, place in bowl and smash and squeeze with your clean hands.


4. In a heavy bottom Dutch oven on high, heat the pot until smoking. (2-3 minutes, maybe longer depending on the output of your burner) Lower flame if too hot
5. Place the beef shank in the pan. Sear on both sides, 3-4 minutes each side. (See above for demo)
6. Remove from skillet to a sheet pan. Reserve any liquid. (But if we seared them properly very little liquid will escape
7. lower heat to medium high
8. Add 2 T. (or more) Extra Virgin Olive Oil to pan. Immediately add onions, carrots, and garlic.
9. Begin to dislodge the fond(see above)
10. Sautee vegetables 5-7 minutes until softened
11. Make a clear space in the pan and add tomato paste. Stir and allow to cook 2-3 minutes
12. Turn off heat and add red wine. (We don't want the wine to flame-up). Return heat and deglaze pan 2-3 minutes
13. Add crushed tomatoes and basil
14. Return meat to pan, cover meat with mixture
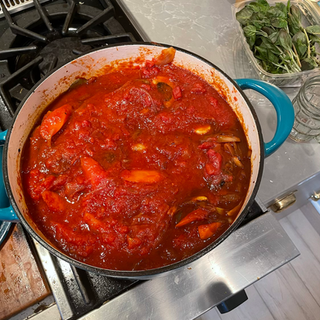
15. Bring to boil on stovetop
16. Transfer covered pot to oven on bottom rack and cook 2-3 hours, checking every hour for liquid evaporation. After 2.5 hours, remove from oven and allow to come to room temperature covered on the stove top. At this point it will continue to cook due to the residual heat from inside the Dutch Oven. Leave Covered.
17. Check tenderness of meat but removing shank. If the meat falls off the bone, the shanks are done.
18. Refrigerate overnight.
Dinner- Time
Remove the shanks, bones and bay leaves from sauce. You can clean bones of marrow to enjoy or add back into the sauce. Gently pull apart segments of meat from each other. Discard bay leaves. Return meat to sauce.


2. Reheat sauce and meat in Dutch oven on medium flame on stove top.

3. Cook pasta according to directions on box
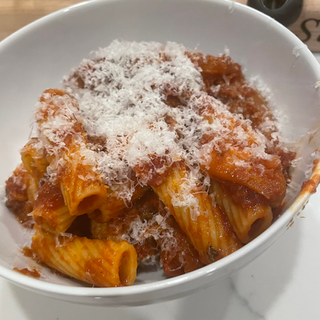
4. When pasta is cooked and drained, add to sauce. Stir to incorporate all of the sauce and meat into the pasta.

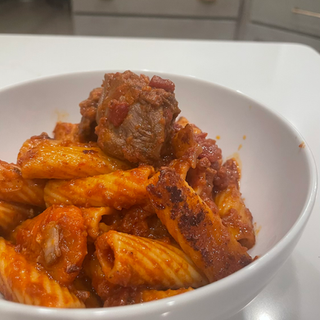
Sprinkle with remaining basil and cheese. Serve Immediately with your favorite crusty bread and beverage.


Bon Appetite!


Great dish CarolofMoon!!! An all time classic recipe...You missed your calling, could have been a pro chef !!