Now Side, Baby, Side: It's the Sidekicks That Make the Meal
- CarolOfMoon

- Nov 18, 2022
- 10 min read
Updated: Nov 13, 2023
Where would Batman be without Robin? The Lone Ranger without Tonto? The Captain without Tennille? Butch Cassidy without the Sundance Kid? Don Quixote without Sancho Panza?! 😗Rakim without Erik B? The Fresh Prince without Jazzy Jeff? (or Carlton? ) Ricky Bobby without Cal Naughton, Jr. ? Thelma without Louise? Salt without Pepa?
The main act is always good, but with their sidekick(s) they are even better.
In my humble opinion, Thanksgiving is nothing without the sides.
There, I said it!
Turkey is but a mere protein. Without the deliciousness of the mashed potatoes, gravy, stuffing, and corn, can it stand alone? How many Thanksgiving dinners were sans turkey and just side dishes becuase the turkey either didn't cook correctly or never thawed out? The sides are what make a meal, a meal.
This week marks my one-year anniversary of writing blogs for Carol of Moon. It's one year we have gotten together to talk about food. It's one year of my passion being written down and shared with others. And it's one year I am humbly grateful you come back and read article after article about food, it's connection to people and memories.
Happy Thanksgiving!
Cooking Class with Carol
Things to Consider
Today I share my thoughts of how to successfully prepare a Thanksgiving feast, the plan of attack I think is right (there is always a wrench put in EVERY plan, so don't fret) and a few side dishes that make that Thanksgiving bird so damn tasty!!
1) Figure out the guest list: 27 family members and friends this year. (I will round up to 30 for leftovers)
2) Plan the menu.
Thanksgiving Menu
by Carol of Moon
4-day dry brined spatchcock turkey
*mashed Yukon gold potatoes
green bean almondine
*roasted Brussel sprouts
Jiffy corn casserole
Momofuku roasted yams
*chicken liver stuffing
pan dripping gravy
freshly made cranberry sauce
rolls and butter
*recipes below
mashed Yukon gold potatoes

Yukon Gold mashed potatoes are creamy, buttery, and simple to prepare. This type of potato takes a little of the guess work out of making mashed potatoes. Your basic russet potato can become pasty and over cooked very quickly. I will make 15 pounds of potatoes, so i will need to make this recipe 7 times! Really, I'll just up the ingredients and make them in one pot. I will need to adjust the cooking time. No matter how small I cut 15 pounds of potatoes, it will take some time to bring to a boil and cook.
2 pounds Yukon gold potatoes, washed and quartered
4 cloves garlic
Kosher salt
1 1/2 cups heavy cream, warm
1 stick cold butter, cut into 9 pats
Place the potatoes and garlic in a large saucepan. Cover with 1 to 2 inches cold water and season generously with salt. The water should taste like the sea. TASTE IT! If the water is under seasoned at this point it will be hard to have a well-seasoned end product. Bring the pot of water to a boil and cook until the potatoes are fork-tender, about 20 to 25 minutes. Drain the potatoes and garlic well. Lay out on sheet pan to dry even more. Wet potatoes are nothing but trouble.
Pass through a food-mill or ricer. DO NOT use a food processor or blender. It will result in a very sticky and rubbery end product. Think of wall paper paste.
While passing the potatoes, bring the heavy cream to a quick boil in a saucepan. Once the cream has come to a boil remove from the heat. Be careful, it can overflow the pot quickly and be a disaster to clean up.
While the potatoes are still hot, add 1/3 of the cream and butter and stir vigorously into the potatoes. Repeat this process 2 more times. You may not use all of the cream for the consistency of mashed potatoes you like. I like my mashed potatoes to have stiff peaks, a little on the thicker side to hold up to the gravy I'll nestle inside them. Taste the potatoes for seasoning and add salt, if needed. Serve immediately or cover with foil and keep warm in an oven on low heat. I usually finish the potatoes as the Turkey is resting 15-30 from cooking.
Chicken Liver Stuffing

I never really thought much about how everyone loved this stuffing until I didn't make it one year. You would've thought the world was coming to an end. The tidbits of cooked chicken liver found throughout the stuffing is the umami (that "what is that great flavor I can't put my finger on" taste) that makes you coming back for more.
Truth is it is hard to find chicken livers in the grocery store anymore. Perhaps it has something to do with processing companies not having the manpower to process the least expensive, but very flavorful parts of a chicken (it's hard to find chicken backs for soup). You can substitute beef liver, or make this recipe without if you can't find them. Check local butcher shops also. *Giant Eagle in McKees Rocks usually has them. And if you can't find them, ask the meat department.
None the less, when I find chicken livers, I buy them and freeze them.
I take some of the guess work, and some of the DIY seasoning of the stuffing out of the equation by using store bought stuffing cubes. I know, don't cancel me just yet! I've done it the bread route but found Pepperidge Farm has a nice variety of different flavors and they just work perfectly for this recipe.
1 stick unsalted butter, plus more for pan and topping
1 tablespoon extra-virgin olive oil
1 cup diced onions
1 cup diced celery
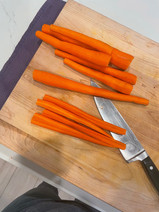
1 cup diced carrots
1 container l, about 12 oz. chicken livers (found in meat department/butcher shop), rinsed, drained and dried. Dried is a very important step to get the sear on the organs. Season with salt and pepper
Kosher salt and freshly ground pepper
3 cups chicken broth
2 eggs, beaten
3- 12 oz bags Pepperidge Farm Stuffing mix (cubed or classic is just fine-- or both)


•In a large sauté pan over medium high heat, add 1 tablespoon of butter and cook chicken livers 3-4 minutes. Check for browning process. Turnover and cook thoroughly another 3-4 minutes. Remove from pan, place on a plate and allow to cool. Coarsely chop livers.
•Do not discard juices or wash pan. Add extra-virgin olive oil and vegetables. Sautee for 2-3 minutes. Scrap any of the pan drippings off of the pan with a wooden spoon. Add about 2-3 tablespoons butter and continue to cook until vegetables are aromatic and translucent, about 4 minutes. Allow to cool.
•In a large bowl, add stuffing and cooled vegetables and chopped livers. Combine ingredients. Add chicken stock and beaten eggs. Mix with hands or spoon to combine.
•In a 9 x13 pan that has been buttered on all sides and bottom, add mixture to the pan. Press down to get all of the ingredients into the pan. It will make a "loaf" consistency. If you want less dense stuffing, use two pans and don't overcrowd the pan.
•Cover with foil and allow to cook in 385-degree oven for 45 minutes.
Roasted Brussel Sprouts

I cook Brussel Sprouts a lot. Roasted and cut on the thinner side, they are a quick and easy way to get nutritious veggies that taste great. Roasting them in the oven brings out a sweetness you don't get from boiling them. Drizzled with basalmic glaze and tossed with blue cheese gives it the extra oomph I'm looking for to entice my kids to eat them again and again. (That's when they were little).
Fat soluble vitamins (A, D, E, and K) found in Brussel Sprouts (as well as other green leafy vegetables) will absorb better when fat is consumed with them. The blue cheese they are dressed with afterward as well as the extra-Virgin olive oil they are tossed in before roasting is the perfect combination of good and healthy. Plus, the mold of the blue cheese is Penicillium Roquefort and is safe for human consumption. It does not produce the same toxins as dangerous molds. Rather, it can be quite healthy, with natural antibacterial properties and the ability to over-take pathogens and strengthen your immune system.
1-pound whole Brussel Sprouts
2-3 tablespoon extra-Virgin olive oil
1 teaspoon kosher salt
1 teaspoon black pepper
4 oz. blue cheese (your favorite crumble or whole piece) - I don't use the stinkiest (rouqfort) but something milder. If you're being adventurous and trying blue cheese for the first time, start slow. An Amish Blue crumble will do just fine for this recipe. My favorite is Gorgonzola, but any blue cheese is good with me. I absolutely love it (especially in salads with pecans with balsamic salad dressing)


Heat oven to 400 degrees. Trim bottom of brussels sprouts, and slice each in half top to bottom. Toss with olive oil, salt and pepper. At this point you can put on baking sheet and into oven and cook for 15 minutes or until tender.
Or
Heat oil in cast-iron pan over medium-high heat until it shimmers; put sprouts cut side down in one layer in pan. Put in garlic, and sprinkle with salt and pepper.
Step 2
Cook, undisturbed, until sprouts begin to brown on bottom, and transfer to oven. Roast, shaking pan every 5 minutes, until sprouts are quite brown and tender, about 10 to 20 minutes.
Step 3
Taste, and add more salt and pepper if necessary. Stir in balsamic vinegar, blue cheese and serve hot or warm.
More helpful tips
A week or more before Thanksgiving
3) Purchase/order your turkey
There is a safe way, and a not-so-safe-way to thaw a frozen chicken.
I won't begin to say I'm an expert to all things safe in the kitchen. So I'll leave it to the authorities to tell you how to safely thaw your turkey.
According to the USDA, The United States Department of Agriculture, there are three ways to thaw a turkey.

Refrigerator Thawing (Recommended)
The USDA recommends thawing your turkey in the refrigerator. This is the safest method because the turkey will thaw at a consistent, safe temperature. This method takes some time, so allow one day for each 4 - 5 pounds of weight. If your turkey weighs 16 pounds, it will take about four days to thaw. Once thawed, the turkey is safe for another two days, so you can start thawing it six days before thanksgiving (the Friday before Thanksgiving).
The other two methods (cold water and microwave) must be done immediately before you start cooking the turkey, so you’ll have to wait until Thanksgiving morning.
Cold Water Thawing
For the cold-water method, leave the turkey in its original wrapping and submerge it in a sink (or container) full of cold water. It is important that the water be cold so that the turkey stays at a safe temperature. You should change the water every 30 minutes. Empty out the water and replace it with fresh cold water. With this method, allow 30 minutes of defrosting time per pound, so a 16-pound turkey will take 8 hours to thaw using this method (so you might need to start around 4 a.m. if you want to eat in the afternoon!). Once the turkey has thawed, cook it immediately
Microwave Thawing
Before you commit to thawing your turkey in the microwave, check your owner’s manual for the size turkey that will fit in your microwave oven, the minutes per pound and the power level to use when thawing a turkey. Remove all outside wrapping and place the turkey on a microwave-safe dish to catch any juices that may leak. Use the defrost function based on weight. As a general rule, allow 6 minutes per pound when thawing a turkey in the microwave. Be sure to rotate it several times, and even flip it, during the thawing process.
If the turkey starts to actually cook instead of just defrost, let it rest for 5 minutes or so before you resume thawing. Partway through thawing you may wish to cover the tips of the wings and drumsticks with a small piece of foil to shield them from the microwaves and keep them from cooking. Once the turkey has thawed you should cook it immediately.
I ordered my bird last week and will pick it up on Saturday before Thanksgiving. I got a 20-pound turkey from Fresh Thyme. I got a fresh bird this year. I plan to dry brine the bird for 4 days in the refrigerator, so I had to get the fresh bird. If not, and I got a frozen bird, I would have to start thawing it 9 days before Thanksgiving, 5 days for the thaw and 4 days for the dry brining.
The week of Thanksgiving
4) Create shopping list from menu and buy quantities accordingly. Check weekly specials on website or the flyers found in the store. Check for duplicate ingredients in menu options and buy accordingly. Check pantry stables from previous years. They may be expired.

I tend to set up my list the way the grocery store is arranged. This way I'm not back tracking a million times to any one section for forgotten items.
USUALLY, grocery stores are arranged from entrance to exit
produce
deli
bakery
dry goods in middle
paper products
meat department
dairy
frozen foods
pharmacy
checkout
5) organize groceries at home on a table so you can see what you have.
6) create cooking schedule/order and steps according to how long it takes to cook. Some appetizers, cranberry sauce, and side dishes can be made a few days ahead and reheated without losing integrity.
The Day Before Thanksgiving
Buy dessert, fresh breads, seafood, and other perishable items.
Defrost pie dough, dinner rolls, and other frozen foods.
Peel, chop, and prep vegetables and side dishes.
Make stock for gravy
Chill wine and beverages.
Stage the table or buffet with serving bowls. Place labels in front of each one to ensure there are enough for each side dish. This will help the flow of the food as well as organize the people in the buffet line.
set the table with linens and dinnerware. Get your favorite table, decorations, and have fun making the tablescape yours.
Thanksgiving Morning Prepare your turkey:
4 Day Dry Brine Spatchcock Turkey Check out the blog on how to prepare the turkey in the dry brine method.

Remove from the refrigerator and let stand at room temperature for at least one hour.
Remove the giblets and roast them to make gravy stock.
Preheat the oven. You can use a steady temperature of 350-375 degrees F, or you can roast at a higher temperature for half an hour, then lower to 350-375 degrees F for the remainder of the cook time.
Rinse turkey with water, and pat dry with paper towels.
Place on a rack in the roasting pan, to help ensure even cooking.
Fill with stuffing. If you're cooking the stuffing separately, fill the cavity with lemons, apples, onions, carrots, celery, garlic, and herbs.
Rub with butter or high-heat oil (not olive oil) and sprinkle with salt, pepper, and spices
Roast the turkey, basting with pan juices if necessary, but I never do. It makes for a much crispier skin.
Tip! Depending on whether you stuff the turkey or not, the cooking time will vary. All times are approximate cooking times at 375 degrees F based on weight.**** *Note:* Oven cooking times vary.
Right Before Dinner
Turkey is done cooking when internal temperature is 165 degrees F (175 degrees F for the thigh).
Allow to sit for 30 minutes so that juices reabsorb before carving.
side dishes and desserts.
Before calling everyone to the table, start the coffee maker.
Last, but not least, enjoy!


Comments